Installation of solar monitoring power supply system
1. Preparatory work
1). Selection of disassembly and assembly location: the disassembly and assembly location shall be near the installation location to facilitate transportation after assembly. In addition, the installation site is paved with rainproof cloth to place wear, scratches and stains caused by bulges or fine sand and stains on the ground.
2). Installation personnel and tools: 1 ~ 2 professional installation personnel (installation personnel can be increased accordingly when the installation task is heavy), each person is equipped with a set of installation tools, including a multimeter, a set of Allen wrench, a flat screwdriver, a triangular lock tooling, a cross screwdriver and a pointed nose pliers, and several rolls of insulating tape and waterproof tape.
3). Check the accessories according to the goods list; Disassemble and check all parts one by one according to the packing list, and check whether there is any damage such as collision, wear, deformation and scratch. Unqualified products are prohibited from installation;
4). Solar modules and easily worn accessories (such as solar panels, monitoring equipment, etc.) must be placed with soft pads to avoid unnecessary damage such as scratches during installation.
2. Assembly of solar power supply system:
1). Assemble the pole assembly and adjust the direction between the pole and the solar panel. When assembling the lamp pole, the bolt connection shall be fastened with uniform stress, and thread locking glue shall be used if necessary;
2). Use the pre-threaded wire to thread the wire. When threading, it is forbidden to pull hard to avoid scratching or even breaking the sheath wire. Sufficient margin must be reserved for the sheath wire connecting the solar panel and the power supply; The power cord connecting the controller shall be bent downward to prevent water from flowing into the terminal along the wire.
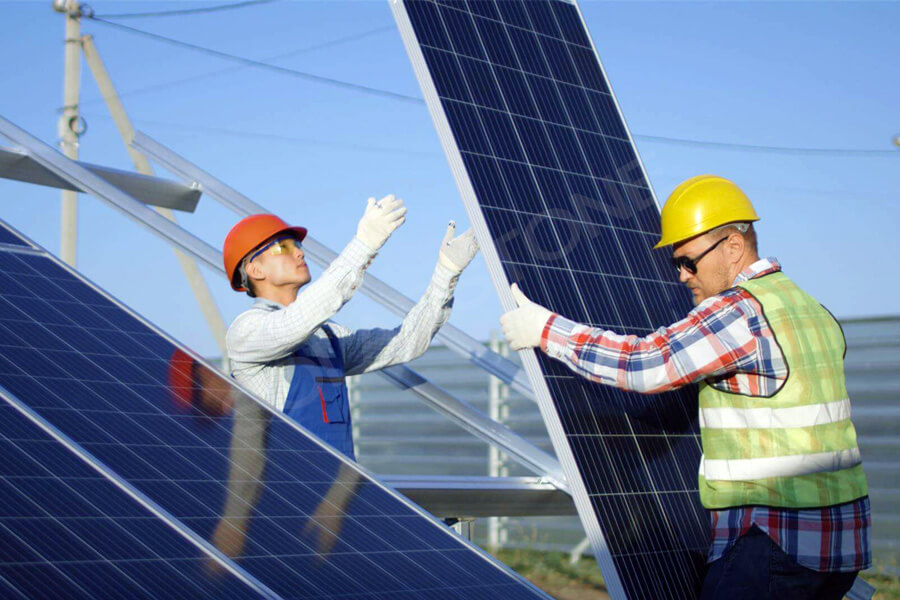
3). Installation of solar panels:
① Module fixing: fix the two sides of the solar panel with bolts and fasten them;
② When placing the solar panel, the junction box shall keep the connecting wire downward;
③ Connecting principle between solar panels:
a. The sheath wire and the terminal of the solar panel must be firmly connected;
b. The sheath wire shall pass through the rod body and shall not be exposed;
c. After connecting, use a multimeter to check whether each line is correct.
Note: solar panels should be handled with care during installation to avoid damage caused by tools and other appliances
4). Surveillance camera: installed according to the camera structure.
3. Install battery compartment (with battery inside)
1). Remove the sundries around and on the surface of the foundation, and dig a pit suitable for the size of the battery buried box next to the foundation; Remove the foreign matters in the embedded threading pipe in the foundation to ensure that the inside of the threading pipe is unblocked;
2). Remove the insulating tape at the connection joint of the battery. It is qualified if the battery voltage is higher than 25V (24V system). Wrap the connection end of the battery with insulating tape to prevent positive and negative short circuits;
3). Put the battery compartment into the pre excavated battery pit, and use iron wire to pass through the threading pipe, with 20mm reserved at both ends of the threading pipe;
4). Connect the battery wiring (the positive and negative poles are wrapped with insulating tape respectively) with the iron wire at the lower end of the threading pipe and wrap it with insulating tape. Slowly pull the iron wire at the upper end of the threading pipe to make the battery wiring pass through the threading pipe; Disconnect the thin iron wire from the battery wiring; When disconnecting the connection between the battery wire and the fine iron wire, ensure that the insulating tape at the sheath wire end is not damaged;
4. Vertical pole
1). 3 ~ 4 people transport the vertical pole near the foundation, and then 2 ~ 3 people lift the lamp to the foundation, slowly lower the flange end of the vertical pole at a suitable position on the foundation (so that the through anchor bolt hole on the flange is aligned with the anchor bolt when the pole is erected), and ensure that the direction of the monitoring head and solar cell plate is correct;
2). A crane shall be used to erect the pole above 8m, and the lifting rope shall be tied at the middle and upper part of the pole. The way of tying the rope must be a loose buckle, so that the rope can be lifted after the lamp pole is erected. In addition, at least two installers shall hold the flange. When the boom gradually stands up the monitoring rod, adjust the flange position at any time to make the anchor bolt pass through the anchor bolt hole on the flange plate;
3). After the monitoring rod is completely erected, put the flat washer and spring washer of corresponding specifications on the anchor bolt, and then fasten them with nuts; When the flange plate is fastened by nuts, the four nuts shall be stressed at the same time and evenly;
4). Put a nut on the anchor bolt.
5. Wiring
1). Remove the cabin door, smooth the sheath wire in the lamp pole, and check whether the sheath wire is damaged during installation. If it is damaged, paste it with waterproof tape, and re-thread it if necessary;
2). Connect the power cord: check whether the control power supply system is in good condition, and connect one by one according to the identification on the controller. The wiring sequence: battery solar panel load. Ensure that the plug is tight and free from looseness;
3). Close the power switch and check whether the light source works normally. If the load has no working voltage, relevant personnel shall check and repair it;
4). Close the distribution box and ensure that the door lock of the box is fastened without looseness.
6. Backfill soil
1). Check the rationality of the placement position of the battery compartment to ensure that it is correctly placed;
2). Fill and compact; The compaction depth in layers shall not be greater than 150mm, and the density after compaction shall not be lower than that of undisturbed soil; The filling must be 50mm higher than the ground;
3). Wipe off the dirt on the rod body with a soft cloth;
4). Remove sundries around the rod body, keep the environment clean and tidy, and count tools;
5). The solar monitoring power supply system has been installed
7. Precautions
1). When installing solar panels, handle them with care. It is strictly prohibited to short circuit or throw solar panels.
2). The connecting wire of solar panel shall be firmly fixed at the support to prevent the terminal from loosening or falling off due to long-term sagging or pulling of the power line.
3). When installing the camera and solar panel, handle with care to ensure that the transparent cover is clean and free of scratches. It is strictly prohibited to roll and throw.
4). Do not touch the battery terminal and control valve when moving the battery. It is strictly prohibited to short circuit, roll or throw the battery.
5). Pay attention to the positive and negative poles during wiring. It is strictly prohibited to connect reversely. The wiring terminals are crimped firmly without looseness. At the same time, pay attention to the connection sequence and do not short circuit the line.
6). Do not touch the “+” and “-” poles of solar panel and battery at the same time to prevent electric shock.
7). Avoid scratching the lamp body during installation.
8). The bolted joints of camera, solar panel support, lightning rod and solar panel are firmly connected without looseness.
9). Solar panels must be protected when installed.
10). During construction on the road, be sure to place a conical warning cylinder 50m outside the operation range, and leave a special person to wave warning signs at the incoming place to remind the passing vehicles to slow down.
11). During construction on the road, one on-site safety personnel shall be arranged to supervise and restrict the on-site construction personnel to operate and construct in accordance with relevant safety specifications to ensure the safe completion of project construction.


